

What is Qi?
Qi is an inductive power transmission standard that is mainly used for charging some recent cell phones wirelessly. Your phone is most probably Qi compatible if it is a new model and manufactured by Asus, HTC, Huawei, LG, Motorola, Nokia, Samsung, BlackBerry or Sony. Check your phone’s datasheet to be sure!
Why bother DIY instead of buying a charger?
A decent Qi charger costs around 30$ where I live and I wasn’t sure I needed it. Just wanted to try out the technology in everyday use without spending too much. This is a real simple project that doesn’t need any special tools.
What you’ll need
- A Qi compatible phone (I use a Nexus 5)
- A cork trivet (pot stand)
- Qi charger electronics
- A sharp blade (exacto knife)
- Hot glue
Let’s get started!
Test the Qi charger with your phone. Experiment with the positioning. Note the minimal and maximal distance when the charger works. Most chargers have an LED which changes colour when the charging is active.
Lay the pot stand on your table and place the electronics on top of it. Mark the ideal position of each piece.

The next step is to carve out some of the corkin a way that the electronics can be embedded later. Start cutting the cork and follow your marks.
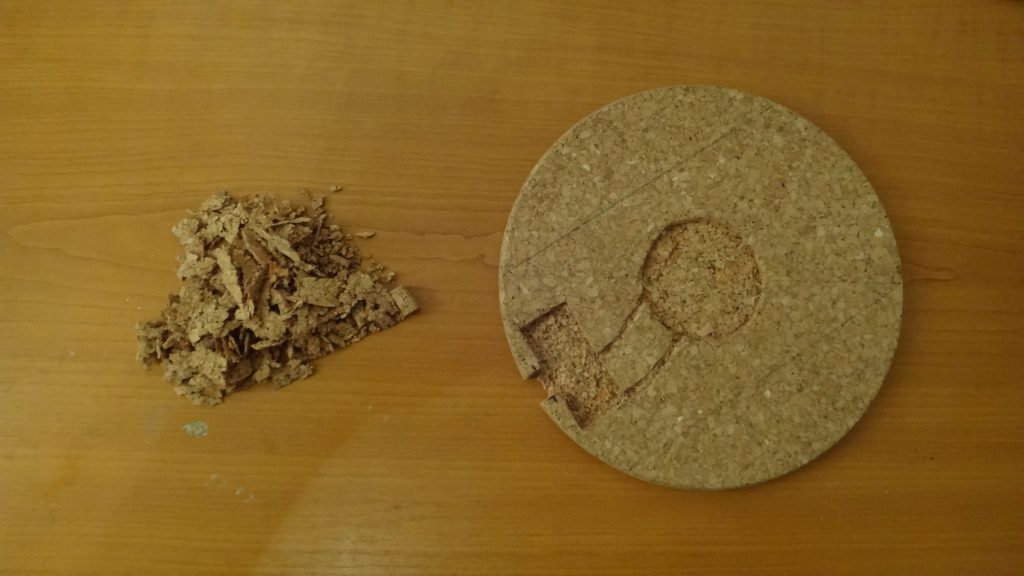
When you’re deep enough, try the electronics in its place. Handle the cables with great care.
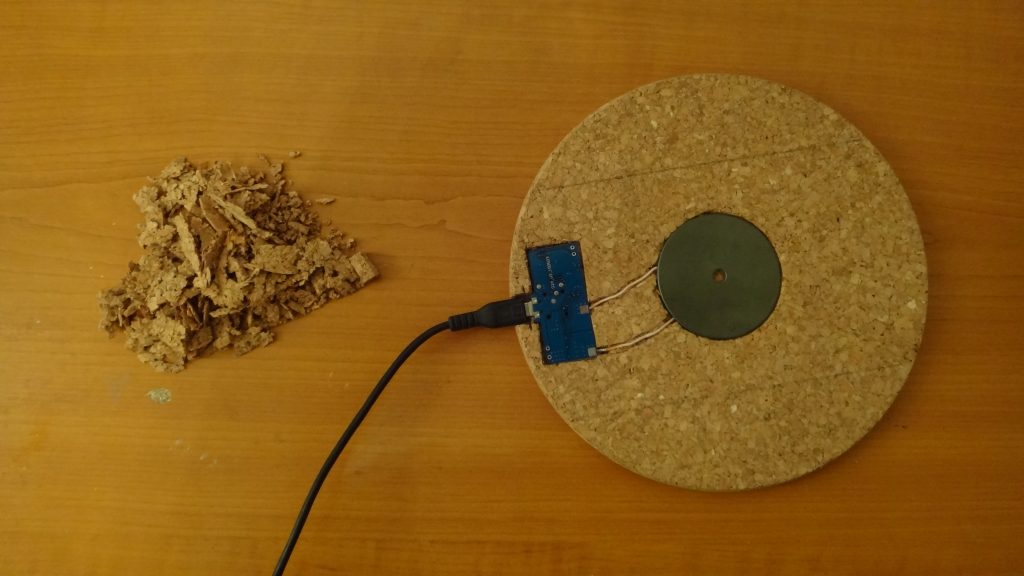
If it fits correctly you can use hot glue to hold everything together.
Your finished charger:
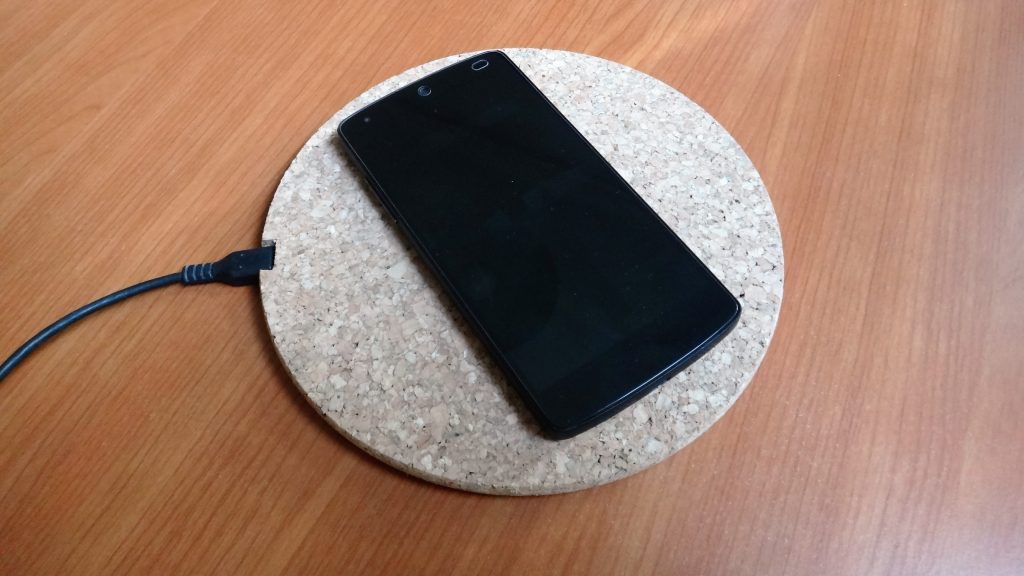
The best thing about this project that you have many-many options to customize your charger. You can use basically any kind of object that can hold your phone and in which you can hide the electronics.
Damn o thought only a wire will be needed.
The wire is Litz and if you are really careful its possible to make your own antenna. Use an inductance meter to check the old unit and then wind coil to same parameters. From memory Qi is quite low frequency so another good method is making your own “Litz” wire using carefully twisted together lengths of enameled wire encased in heatshrink or salvaged wire from a broken SMPS. Some newer LCD TVs use this approach for the inverter.