
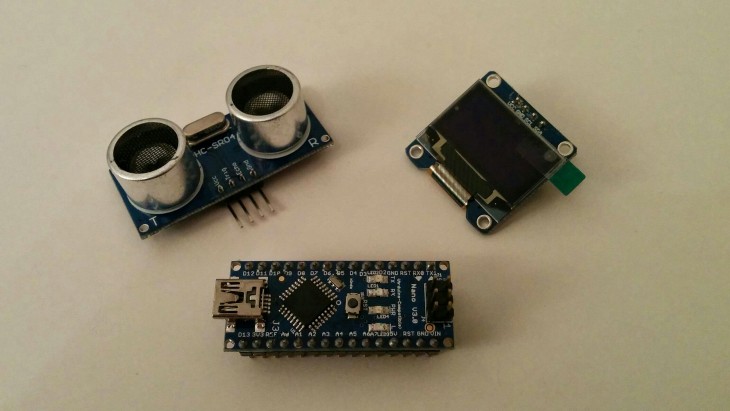
In this project we’ll build a small device that measures the distance of an object in front of it and displays the result in centimeters. We are going to combine three gadgets:
- HC-SR04 sensor for measuring the distance
- Arduino Nano clone for communication between the modules and doing some calculations
- A small OLED screen for displaying the result
Let’s start by connecting the modules on a small prototyping breadboard. I’m using the smallest one that has 23 columns. The Arduino Nano goes on the left and occupies the first 15 columns so there’s plenty space left for the other modules. I’m using the following wires:
- TRIG of sensor to D10 of Arduino Nano
- ECHO of sensor to D11 of Arduino Nano
- SCL of display to A5 of Arduino Nano
- SDA of display to A4 of Arduino Nano
- All GND lines connected together
- All 5V lines connected together
I’m also using a separate 5v power supply because when I used the USB cable for powering the board I had stability issues. I always recommend a dedicated power supply if you’re playing with more than one device at the same time. Here’s a photo of the fully connected system:
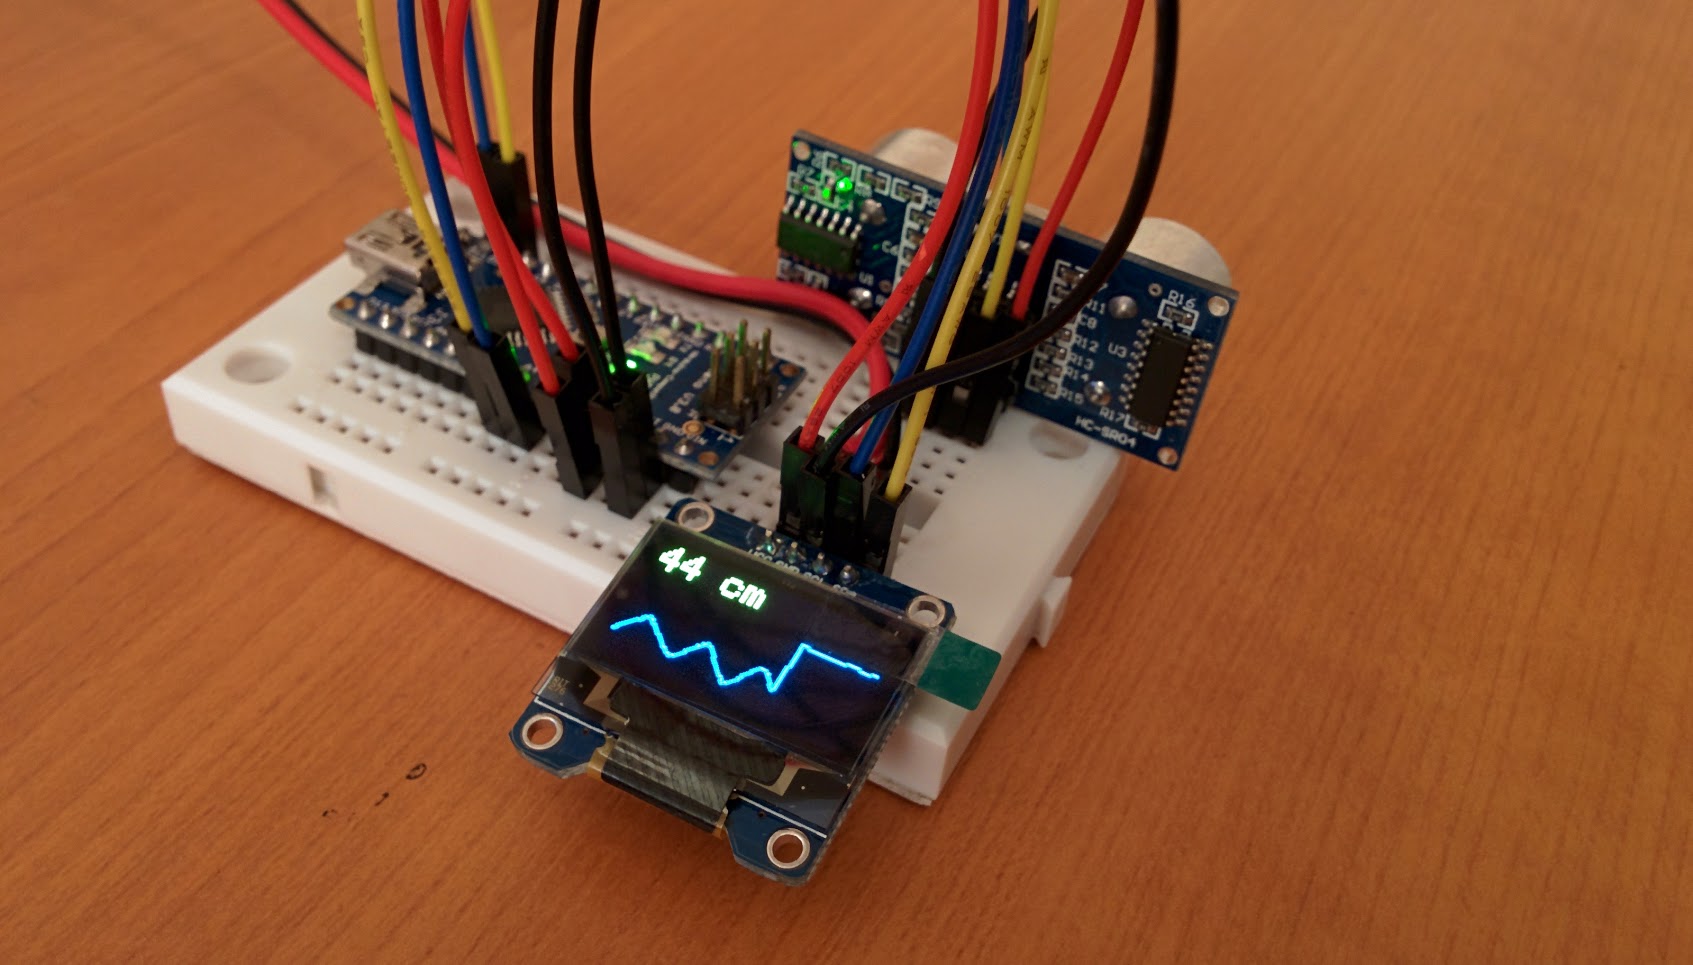
I decided to use the yellow part of the screen to numerically display the actual distance and the blue part to have a nice little graph. Now let’s start the Arduino IDE and start coding.
#include <SPI.h>
#include <Wire.h>
#include <Adafruit_GFX.h>
#include <Adafruit_SSD1306.h>

#define OLED_RESET 4
Adafruit_SSD1306 display(OLED_RESET);

int outPin = 10;
int inPin = 11;

int distances[128];
First we include the necessary libraries, define the pins used for the ultrasonic sensor and the display (note: the reset pin is actually not necessary for this particular display) and create an empty array for the distance values of the graph. Since the horizontal resolution of the screen is 128, we need an array of integers of the same length. After that, we use the following setup:
void setup() {
  pinMode(outPin, OUTPUT);
  pinMode(inPin, INPUT);

  display.begin(SSD1306_SWITCHCAPVCC, 0x3C);
}
We setup the pins for input and output and initialize the display with the address 0x3C. The main loop consists of three sections:
void loop() {
  digitalWrite(outPin, HIGH);
  delayMicroseconds(15);
  digitalWrite(outPin, LOW);
  int distance = pulseIn(inPin, HIGH);
  distance  = min(distance / 58, 48);

  display.clearDisplay();

  int i;
  for (i = 0; i < 127; i++) {
    display.drawLine(i, 64 - distances[i], (i + 1), 64 - distances[i + 1], WHITE);
    distances[i] = distances[i + 1];
  }
  distances[127] = distance;

  display.setTextColor(WHITE);
  display.setCursor(0, 0);
  display.setTextSize(2);
  display.print(distance);
  display.print(" cm");
  display.display();

  delay(10);
}
In the first few lines we use the ultrasonic sensor to measure the distance. We maximize the measured value to 48 centimeters because that’s all the resolution we have left for the graph (64 – 16 pixels). Then we clear the display and in the for loop we simultaneously shift the distance vales in the array and draw the graph point to point. In the last segment we draw the current distance value in the first line and with display.display() we actually refresh the display. After this, we’re ready to compile and upload the code to the Arduino Nano. Here’s how it looks like while running:
That’s all! We created a small measurement instrument in about 10 minutes. For more details of the three gadgets used see the links in the beginning of this post.
Hi There,
Thank you very much for sharing this. I just put one together with one of my Uno’s and all worked like a charm. My son is doing a science fair project on Sonar. I already have a Bot built and can now add this to display some of the distance readings in real time for him and his classmates.
Thanx,
JohnnyFRX
GOOD ITS WORK thanks i playing with it
Thank you
I have improved a lot with this beautiful lesson
But I had a problem and I wanted to introduce it here.
I had this error:
exit status 1 error compiling for board arduino
The problem has been resolved by changing the distance value from:
int distances [128];
to me
int distances [90];
thank you